Welcome, fellow food fanatics and fermentation curious! If you’re anything like me, you’ve been scrolling through social media, seeing all those gorgeous, rustic loaves of homemade sourdough, and thought, "I want that." But then you look at pictures of a starter—that bubbly, gloopy, often greyish, sometimes smelly jar of flour and water—and a tiny voice screams, "That looks gross! Is that even safe?!"
I’m here to tell you, as a baker and food enthusiast who's been nurturing my own wild yeast pet (I call her 'Flo'), that the journey to incredible sourdough starts with a humble, sometimes alarming-looking mixture that is completely safe, entirely natural, and ridiculously healthy for your baking and your gut. Forget the complicated rules and the anxiety. We're going to break down how to create your own robust, low-maintenance starter, turning that "gross" factor into a badge of honor. By the end of this, you’ll be looking at a layer of 'hooch' (that grey liquid on top) and thinking, "Ah, my little darling is hungry."
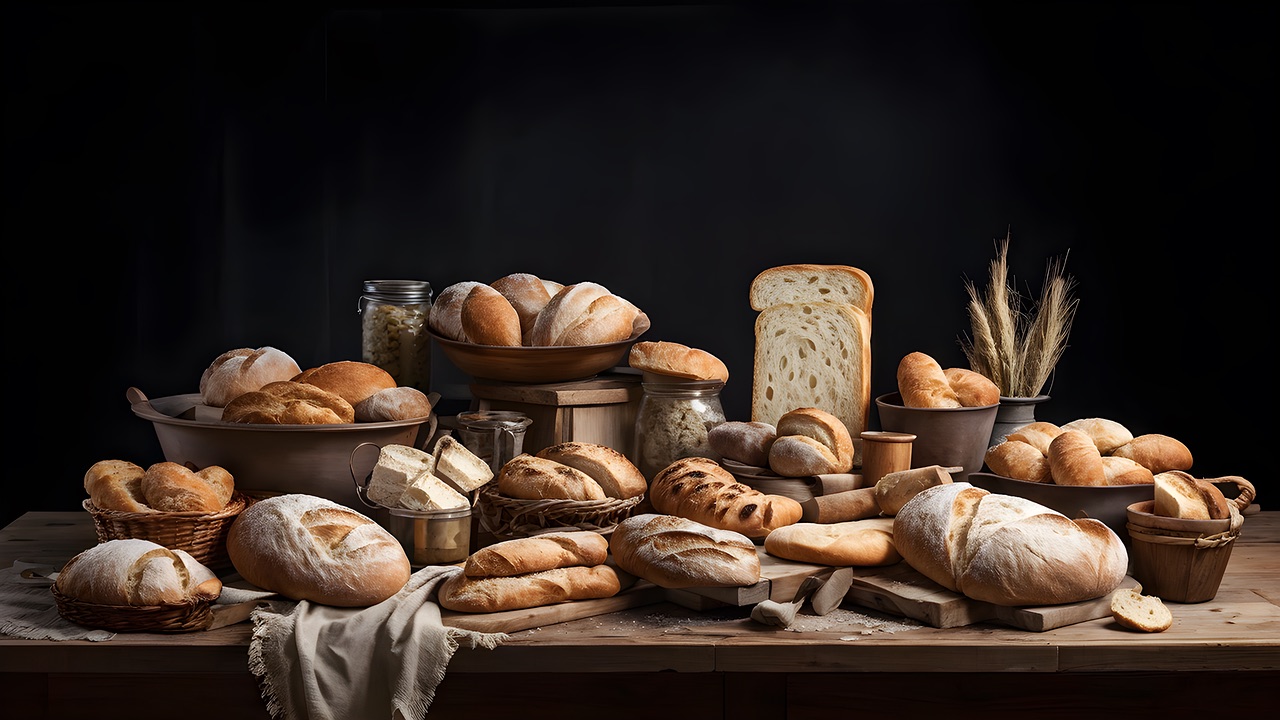
Creating and maintaining a sourdough starter is genuinely one of the most rewarding things an at-home cook can do. It’s a living testament to the magic of food science, requiring only two cheap ingredients—flour and water—and a little patience. Whether you bake every week or just a few times a year, having a starter on hand means you’re always just a few hours away from turning those ingredients into crusty, complex, digestible bread that store-bought loaves can only dream of being.
Let's dive into how to summon the wild yeasts and bacteria floating around your kitchen and turn them into the engine for your best baking!
🛍️ The Shopping & Equipment List: Minimalist Magic
The beauty of starting a starter is that you don't need a professional baker's kitchen. If you have a clean jar and some flour, you're 90% there. Here’s what you’ll need to get set up:
Ingredients (The Fuel)
- Flour: Start with organic whole-rye flour or organic whole-wheat flour. The whole grains contain more natural nutrients and wild yeast, which makes the initial activation much faster and stronger than just using plain white flour. Once active, you can switch to all-purpose or bread flour for maintenance.
- Water: Filtered or good quality tap water is best. Avoid heavily chlorinated water, as chlorine can inhibit the growth of the beneficial bacteria we want. Leave tap water out in an open container for an hour or two to let the chlorine evaporate.
Equipment (The Tools)
- A Clean Jar: A medium-sized, clear glass jar with straight sides is ideal (like a mason jar or a wide-mouth pickle jar). The straight sides make it easier to see how much your starter is rising.
- Lid (Loose-Fitting): You need something that will cover the jar but *not* seal it completely (like a clean cloth, cheesecloth secured with a rubber band, or a jar lid resting lightly on top). Your starter needs to breathe!
- Digital Kitchen Scale: This is non-negotiable for success. Baking is chemistry, and volumes (cups) are inconsistent, especially with flour. We will be using a 1:1 ratio, which is only accurate by weight.
- Rubber Spatula or Wooden Spoon: For mixing. Avoid using your hands as they can introduce unwanted bacteria.
- Rubber Band or Marker: To mark the initial level of the starter so you can track its growth.
🧪 Day 1-7: The 'Ugly Duckling' Phase of Fermentation
This is where things might get a little weird, a little smelly, and a lot of fun. Be patient. Your kitchen is essentially becoming a microbial petting zoo.
Day 1: The Initial Mix
In your clean jar, combine 50 grams of your initial flour (rye or whole wheat) and 50 grams of water. Stir it until it forms a thick, uniform paste—no dry bits of flour! Scrape down the sides of the jar and cover it loosely. Mark the level with a rubber band. Place the jar in a spot with a relatively consistent room temperature (ideally 70°F to 75°F or 21°C to 24°C).
Day 2-3: The Quiet Stage (and the first weird smell)
You might not see much activity yet, but rest assured, the microscopic party has begun. On Day 2, simply discard half of the starter (or save it to use in pancakes or crackers) and feed the remaining half with another 50g flour and 50g water. Repeat this process on Day 3. You might notice a faint smell like old cheese or foot socks—DO NOT WORRY! This is normal, and it’s the initial bacteria getting established before the desirable yeast takes over.
Day 4-7: Bubble Trouble and the Sour Scent
Around Day 4, you should start seeing bubbles! This is the good news: the wild yeast has woken up! It might rise, then deflate. Keep feeding it daily: discard half, then add 50g flour and 50g water. The smell should change from cheesy/stinky to a pleasant, tangy, slightly fruity or sour aroma—this is the smell you want. Congratulations, you're halfway to having a mature starter!
🦠 What is the 'Gross' Stuff and Why is it Safe?
Let's address the elephant in the jar: the unappetizing appearance of a neglected or very active starter. It’s important to understand *why* this mixture is not only safe but also incredibly beneficial.
The Science: Lactic Acid Bacteria and Yeast
A sourdough starter is a symbiotic culture of bacteria and yeast (SCOBY), similar to the one used to make kombucha. The bacteria are primarily Lactobacilli (the same good bacteria found in yogurt and pickles), which produce lactic and acetic acids. These acids are what give sourdough its signature tangy flavor and, critically, act as a preservative that prevents the growth of harmful molds and pathogens.
The wild yeast, meanwhile, is munching on the flour's starches and converting them into carbon dioxide gas (the bubbles!) and alcohol. This fermentation environment is naturally acidic ($pH < 4.5$), making it hostile territory for most bad bugs.
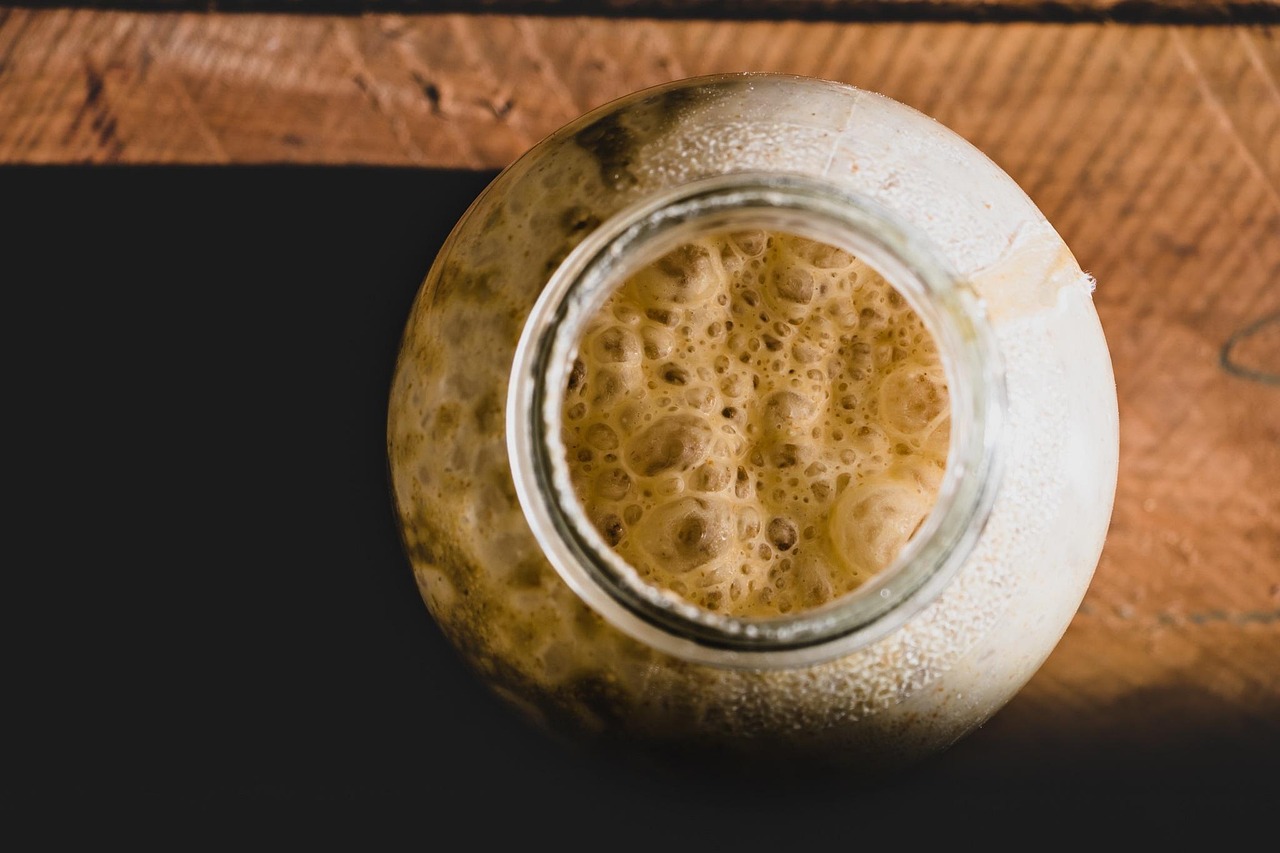
"Hooch": The Grey Liquid of Hunger
Sometimes, when your starter gets really hungry—meaning it’s used up all the food you gave it—a layer of grey or dark liquid will form on top. This is called hooch, and it’s nothing more than alcohol and water, a byproduct of the yeast's feast. It looks terrible, but it is safe!
- What to do: You can either stir the hooch back in (it adds a strong, tangy flavor) or pour it off (for a milder taste).
- What it means: It's a clear signal: "Feed me!" Just discard half and feed your starter as usual. If it happens frequently, switch to a twice-a-day feeding schedule until it's more stable.
🏡 Maintenance: From Counter Pet to Fridge Beast
An established starter is an amazing, low-maintenance friend. You'll know it's ready for baking when it consistently doubles in size 4-8 hours after a feeding and has a web of bubbles throughout.
Option A: The Countertop Pet (High Maintenance, Always Ready)
If you bake daily or every other day, keep your starter on the counter. You will need to feed it once or twice a day at a 1:1:1 ratio (1 part starter : 1 part flour : 1 part water by weight). For example, if you have 50g of starter, discard the rest, and add 50g flour and 50g water. This keeps it vigorous and ready to be used at peak rise.
Option B: The Fridge Beast (Low Maintenance, Perfect for Casual Bakers)
For the rest of us, the fridge is the perfect home. Cold temperatures slow down fermentation dramatically, essentially putting your starter to sleep. This is the low-maintenance dream.
- Feed: Give your starter a robust feeding, allow it to sit on the counter for 1-2 hours until you see the first signs of bubbles (this ensures it's happy and strong).
- Refrigerate: Place the jar, with the lid on but slightly ajar, into the fridge.
- Feed Cycle: You now only need to feed it once a week!
When you want to bake, pull it out of the fridge the night before, feed it, and let it warm up and activate on the counter. It might take two feedings to get back to its peak activity, but it's worth it for the hands-off maintenance.
💀 Don't Fear the Mold: When to Toss It
There's only one thing that means your starter is truly *spoiled*, and it’s not the hooch, the smell, or the grey color. It's mold. And honestly, it’s quite rare in a strong, healthy starter due to that protective acidity.
What to Look For (And What to Ignore)
- Ignore: Hooch (grey liquid), funky cheese/foot smell (especially in the first week), a sluggish rise, or a texture like wallpaper paste. These are signs of hunger or an imbalance, not spoilage.
- Toss It: Visible mold. This will look like fuzzy, distinct spots of green, pink, or black (not the thin grey layer of hooch). Because a starter is liquid, mold spores penetrate the entire volume. If you see fuzz, thank your microbial friend for its service, toss it out, clean the jar with boiling water, and start a new one.
But please remember, a healthy starter is a fortress! It's one of the oldest forms of food preservation known to man. The acids are your friends, keeping everything safe and delicious.
Conclusion: Your New Kitchen Buddy
Creating and maintaining a sourdough starter is a rite of passage for any serious home cook, and it’s much simpler than most people think. You’ve taken two basic ingredients and, with a little time, harnessed the power of the wild to create something that’s not only a leavening agent but also a *health food* thanks to the extensive predigestion of starches by the yeast and bacteria. Sourdough is often easier for people with gluten sensitivities to digest!
So, stop worrying about the weird smells and the questionable aesthetics. Embrace the "gross." That jar of bubbly, sour paste is your ticket to superior pizza dough, the best pancakes you’ve ever had, and of course, a loaf of bread with a crusty exterior and an impossibly airy, tangy interior. Happy baking, and happy feeding!